Step 2: Create Sample CA SiteMinder Administration Server Objects
Learn how to install CA SiteMinder Web Agent and configure CA SiteMinder Objects.
On this page:
- Install CA SiteMinder Objects
- Create Host and Agent Configurations
- Create Domain and Realm Confirmation
Install CA SiteMinder Objects
Using the CA SiteMinder Administration Console, create the CA SiteMinder objects. This step must be performed before installing Akana Policy Manager and Akana Network Director so both applications can connect to and use CA SiteMinder. The following table illustrates the objects that should be defined. Sample names are provided for illustration purposes:
| Object Name | Description |
|---|---|
| Web Agent | Named soaws-agent |
| Agent Group | Named soaws-grp and containing the new soaws-agent agent. Adding an Agent Group is optional. |
| Agent Configuration Object | Named soaw with just the following property:
DefaultAgentName: soaws-agent |
| Domain | Named soaws-domain. Configured for the User Stores that your organization will be using to authenticate end-users. |
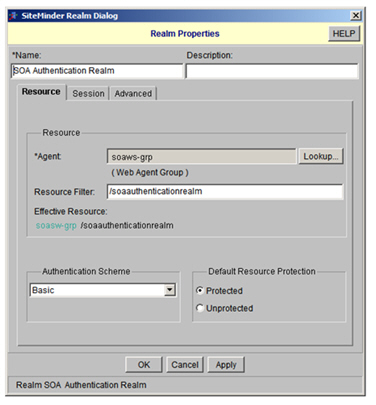
| Realm | Within the new Domain named soa-auth-realm configured with:
Agents: soaw-group Resource filter: /soaauthenticationrealm Authentication scheme: Basic |
Create Host and Agent Configurations
To create host and agent configurations perform the following steps:
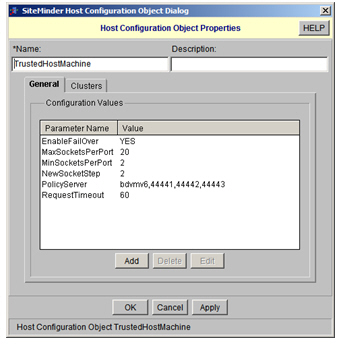
Create Host Configuration
Create a Host Configuration or verify that one is already defined.
- Launch the CA SiteMinder Administration Console.
- Enter the name of the host machine.
- Click Apply, then OK to continue.
Create Agent
- Enter the name of the agent (e.g., soaws-agent).
- Select the SiteMinder agent type.
- Click Apply, then OK to continue.

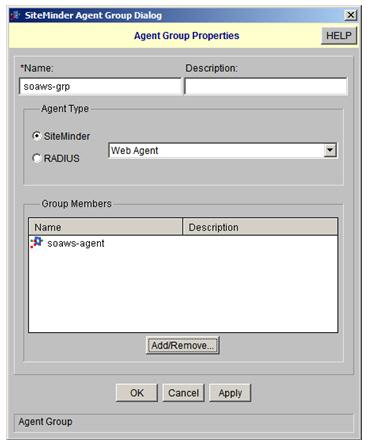
Create Agent Group
You can add the Agent to an Agent Group. This step is optional.
- Enter a group name (for example, soaws-group).
- Select the CA SiteMinder agent type.
- Verify that the group member matches agent specified in the previous step (for example, soaws-agent).
- Click Apply, then OK to continue.
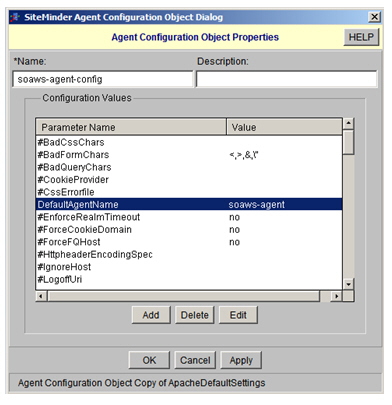
Create Agent Configuration Object
The Agent Configuration Object must be the default Agent Name or a list of Agent Names. The Agent Name parameters are used to map Agent Names to specific hosts within a single Agent Configuration Object.
- Set the DefaultAgentName property to your agent above (for example, soaws-agent).
- Click Apply, then OK to continue.
Create Domain and Realm Configuration
To create a domain and realm configuration, perform the following steps:
Create Domain and Realm
This task should be performed once per integration rather than once per agent/host.
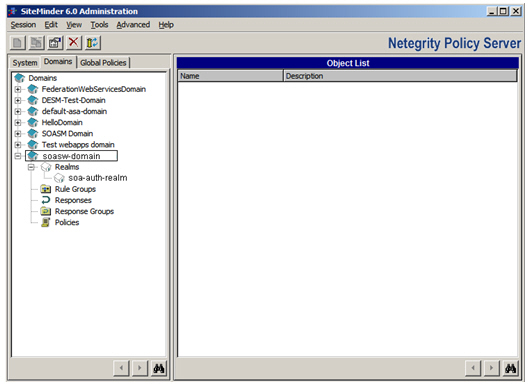
- In the SiteMinder Administration Console, click the Domains tab.
Set User Store for Domain
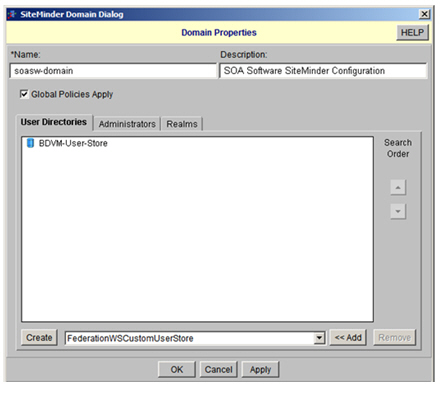
- Right-click on the Domain you would like to configure. The SiteMinder Domain Dialog > Domain Properties screen displays.
- Set the user store your organization will be using to authenticate users.
Add Realm Rule
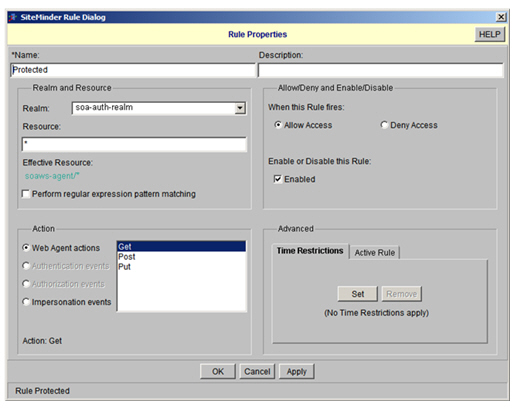
- On the SiteMinder Rule Dialog > Rule Properties screen, select the realm from the drop-down menu.
- Configure the remaining screen options as illustrated in the screen illustrations below.
Add Policy to Domain
- On the SiteMinder Policy Dialog > Policy Properties screen, use the Add/Remove button to select the user group and rule to use.
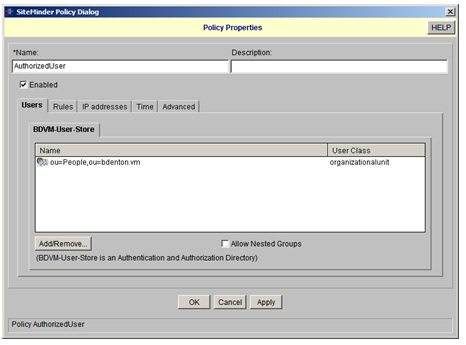
SiteMinder Policy Dialog: Policy Properties (Users)
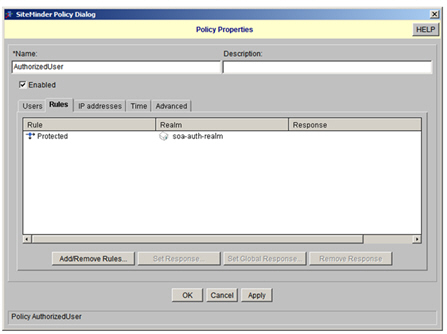
SiteMinder Policy Dialog: Policy Properties (Rules)
Set Resource Filter
You will also need to protect resources (Default: /soaauthenticationrealm) that Network Director will use when it is authenticating the SSO token. To accomplish this:
- Create an SOA authentication realm under the same domain.
- Set the resource filter to /soaauthenticationrealm (which will be used later).