Step 5: Install Akana CA SiteMinder Security Features
Learn how to install and configure CA SiteMinder features on Policy Manager and Network Director containers.
On this page:
- Introduction
- Step 1: Install CA SiteMinder Features on Policy Manager Container
- Step 2: Install CA SiteMinder Features on Network Director Container
Introduction
The next step is to install the Akana CA SiteMinder Security Provider and Akana CA SiteMinder Security Provider UI features. Instructions are provided for Policy Manager 7.x and Network Director containers.
Akana CA SiteMinder Security Provider UI Feature
- This feature adds security integration with CA SiteMinder and should only be installed in the container where the Akana Policy Manager Services and Akana Policy Manager Console features are installed.
Akana CA SiteMinder Security Provider Feature
- This feature contains the Identity System configuration wizard for the Security Integration with CA SiteMinder and should be installed in containers where the Network Director or Agent features are installed. The Akana CA SiteMinder Security Provider UI feature should not be installed on these containers.
OAuth Features
- If you are integrating CA SiteMinder with the Akana Enterprise API Platform, and have installed any of the Akana OAuth features, the Akana CA SiteMinder Security feature must be installed on the same container as well.
Step 1: Install CA SiteMinder Features on Policy Manager Container
Install BOTH the Akana CA SiteMinder Security Provider and Akana CA SiteMinder Security Provider UI features on the Policy Manager container.
Note: Installation of the SiteMinder Web Agent product is required before installing and using the Akana CA SiteMinder Security Provider feature.
- Launch the Akana Administration Console (http://{hostname}:{port}/admin/).
- On the Installed Features screen, select the Akana CA SiteMinder Security Provider and Akana CA SiteMinder Security Provider UI features, and click Install Feature.
- After the installation is complete, the Configure button will display. Note, the display of the Configure button could take up to one minute.
- Click Configure. The CA SiteMinder Security Provider Options screen displays. The CA SiteMinder Identity System you will be defining in a later step, must be able to access the SiteMinder Web Agent IP. This is accomplished by specifying the file path where the CA SiteMinder Web Agent product is installed (i.e., webagent folder) on the current container's server.
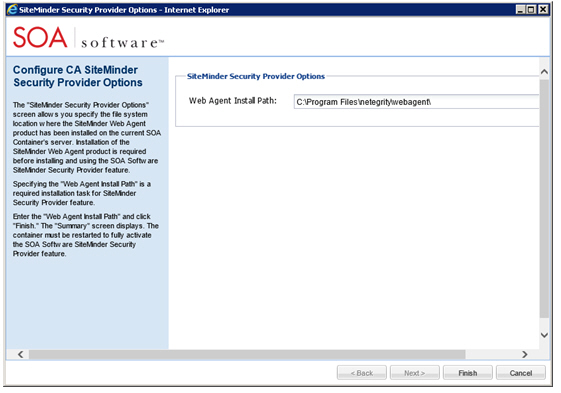
- Enter the Web Agent Install Path and click Finish, then click Close.
- Select the System tab and click Restart to activate the Akana CA SiteMinder Security Provider feature.
Step 2: Install CA SiteMinder Features on Network Director Container
Install ONLY the Akana CA SiteMinder Security Provider feature to Network Director containers. Do not install the Akana CA SiteMinder Security Provider UI feature.
Note: The Akana Network Director features must be installed to the Network Director container and configured prior to installing the Akana CA SiteMinder Security Provider feature.
- Launch the Akana Administration Console for the Network Director container (http://{hostname}:{port}/admin/).
- On the Installed Features screen, select the Akana CA SiteMinder Security Provider, and click Install Feature.
- After the installation is complete, the Configure button will display. Note, the display of the Configure button could take up to one minute.
- Click Configure. The CA SiteMinder Security Provider Options screen displays. This screen allows you specify the file system location where the CA SiteMinder Web Agent product has been installed on the current container's server.
- Enter the Web Agent Install Path and click Finish, then click Close.
- Select the System tab and click Restart to activate the Akana CA SiteMinder Security Provider feature.