Install the Cumulative Upgrades and Rollback Changes
This section explains how to install the cumulative upgrades containing fixes or minor enhancements and rollback changes to the previous snapshot that return the application to its original state.
On this page:
- Introduction
- Prepare for the upgrade
- Create a new container
- Upgrade the existing container with a minor release
- Rollback minor release from a container
- Troubleshooting
Introduction
The cumulative upgrades include fixes and enhancements for in-place container upgrades. Instead of downloading each relevant update separately, they are bundled together and are available on the product download site. You can download and unzip the cumulative upgrade in the install folder and apply it to a container. The in-place container upgrades and rollbacks are executed on a running container. The updates are part of the cumulative upgrade and can be directly applied from the Admin Console or using an automation recipe for installed features.
As an administrator, you can rollback the changes to a previous snapshot. A snapshot of the container state is automatically created prior to upgrade, allowing updates to be easily uninstalled using the rollback function. To rollback changes to a previous snapshot, do not use the Uninstall Feature instead, use the Rollback Changes feature.
To upgrade your Akana API Platform to version 2026.2.x, you can follow one of two methods based on whether you are creating a new container or upgrading an existing one.
- Create a new 2026.2.x container
This method involves installing the 2026.2.x container(s) into your environment without first upgrading the old containers.
- Upgrade an existing 2026.2.x container with the latest cumulative release
This method involves updating your current 2026.2.x container by applying the cumulative distribution, which contains all the incremental changes from earlier versions to ensure the deployment works seamlessly with the latest fixes and features.
Video content: In-Place container upgrade
For details, see the video content for in-place cumulative upgrade to a container.
Prepare for the upgrade
The cumulative upgrades are available to download from the Akana Support Portal. The portal provides the files that contain a cumulative distribution, allowing you to apply the latest updates.
Before you begin, you will need to:
Step 1: Download ZIP files
- Log in to the Akana Support Portal.
- Go to the Product Downloads > Akana - Product Downloads > API Platform.
- Under the API Platform, download the ZIP files from the 2026.2.x > Fix Packs folder into your install directory. The folder contains the 2026.2.x installation files and cumulative ZIP files for some or all of the following components:
- analytics-manager-YY.x.x-cumulative-pack.zip
- analytics-plugin-YY.x.x-cumulative-pack.zip
- api-platform-YY.x.x-cumulative-pack.zip
- platform-YY.x.x-cumulative-pack.zip
- saas-optionpacks-YY.x.x-cumulative-pack.zip
Step 2: Extract installation files
- Go to your install directory.
- Unzip each of the ZIP files you downloaded and extract the content of the files.
Step 3: Verify database scripts
The database administrators can manually run Data Definition Language (DDL) or Data Manipulation Language (DML) queries instead of executing them as tasks through the application in the install directory.
The install directory includes the following folders:
- dbscripts: Includes all database scripts related to Policy Manager located directly under the install directory.
- api-portal-dbscripts: Includes all database scripts associated with Community Manager located directly under the install directory.
- oauth-dbscripts: Includes all database scripts related to the OAuth functionality located directly under the install directory.
- lass-addons: Includes all database scripts related to Logging as a Service (LAAS) located under the api-portal-dbscripts directory.
In addition to the dbscripts, there are delete-dbscripts available for rollbacks in the corresponding folders. However, these rollbacks apply to DML scripts located in the data folder and do not apply to DDL scripts.
Step 4: Backup your database
Perform a full database backup before applying upgrades that involve schema changes. This ensures you can restore the database to its previous state if necessary.
The container's admin console displays any pending database schema changes under the "Installed Features" tab. You must complete these pending installation tasks after the successful upgrade.
Step 5: Backup your previous installation
To safeguard against potential issues during the upgrade, back up the entire install folder. This allows you to revert to your current version if necessary. Copy the install directory to a secure location.
Create a new container
To create a new 2026.2.x container, follow these steps:
- Log in to the Akana Support Portal.
- Go to the Product Downloads > Akana - Product Downloads > API Platform.
- Under the API Platform, download the appropriate 2026.2.x ZIP file for your operating system.
- Unzip and extract the contents of the ZIP file into the install directory.
- Download the latest cumulative release update from the 2026.2.x > Fix Packs folder.
- Unzip and extract the content of the fix pack ZIP files into the install directory.
You can use the Admin Console or an automation recipe to deploy the container.
Upgrade the existing container with a minor release
When performing a minor upgrade to the Akana API Platform using the cumulative distribution method, you have two options for the upgrade process:
- Install cumulative upgrade from the Admin Console
This method allows you to initiate and manage the upgrade directly through the Admin Console. The Admin Console provides a user-friendly interface for performing the upgrade, making it a convenient choice if you are managing the upgrade manually or prefer a graphical interface.
- Install cumulative upgrade using an automation recipe
This method involves using predefined automation recipes to automate the upgrade process. The recipes can help streamline and accelerate the upgrade, especially in environments where upgrades need to be repeated across multiple containers or in large-scale deployments.
Install cumulative upgrade from the Admin Console
The Admin Console allows you to install the cumulative updates into the container. To update the features, refresh the repository using the Repository tab or restart the administrator console to view the changes to a bundle. You can also select a feature line item and click Search for Updates to install the updates specific to a product feature.
To search and install the updates
- Log in to the Admin Console and go to the Installed Features tab.
- Click Search for Updates. The installation wizard opens and displays a list of available updates.
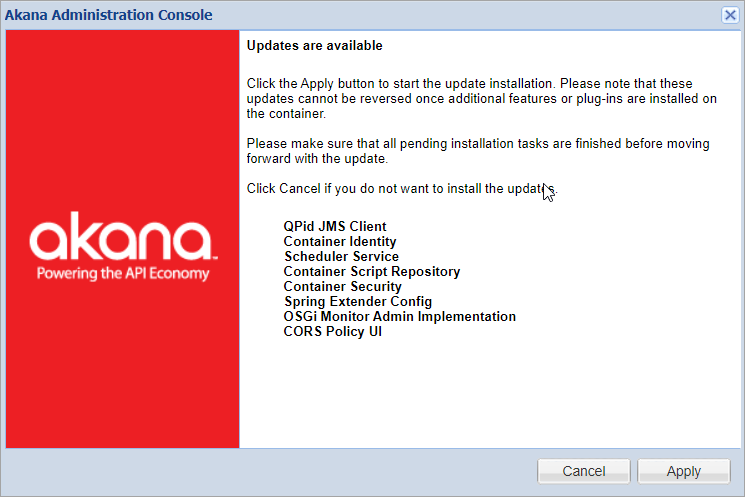
- Click Apply to install the updates.
After the upgrade is successful, you must complete any pending installation tasks under the "Installed Features" tab of the container's admin console.
Install cumulative upgrade using an automation recipe
You can download and unzip the cumulative upgrade ZIP files in your install folder and apply it to a container using the install-patch.json automation recipe. For more information see, Using the install-patch recipe to install the cumulative upgrade.
Rollback minor release from a container
To roll back a container to a previous version or a minor release, you can follow a few approaches depending on how the container is being managed. The general steps to rollback changes using the Admin Console or an automation recipe are outlined below.
Rollback changes using the Admin Console
Use the rollback changes feature to remove an update to a package and restore the system to an earlier snapshot by choosing the snapshot date and time.
To rollback changes
- Log in to the Admin Console and go to the Installed Features tab.
- Click Rollback Changes. The rollback changes dialog box opens.
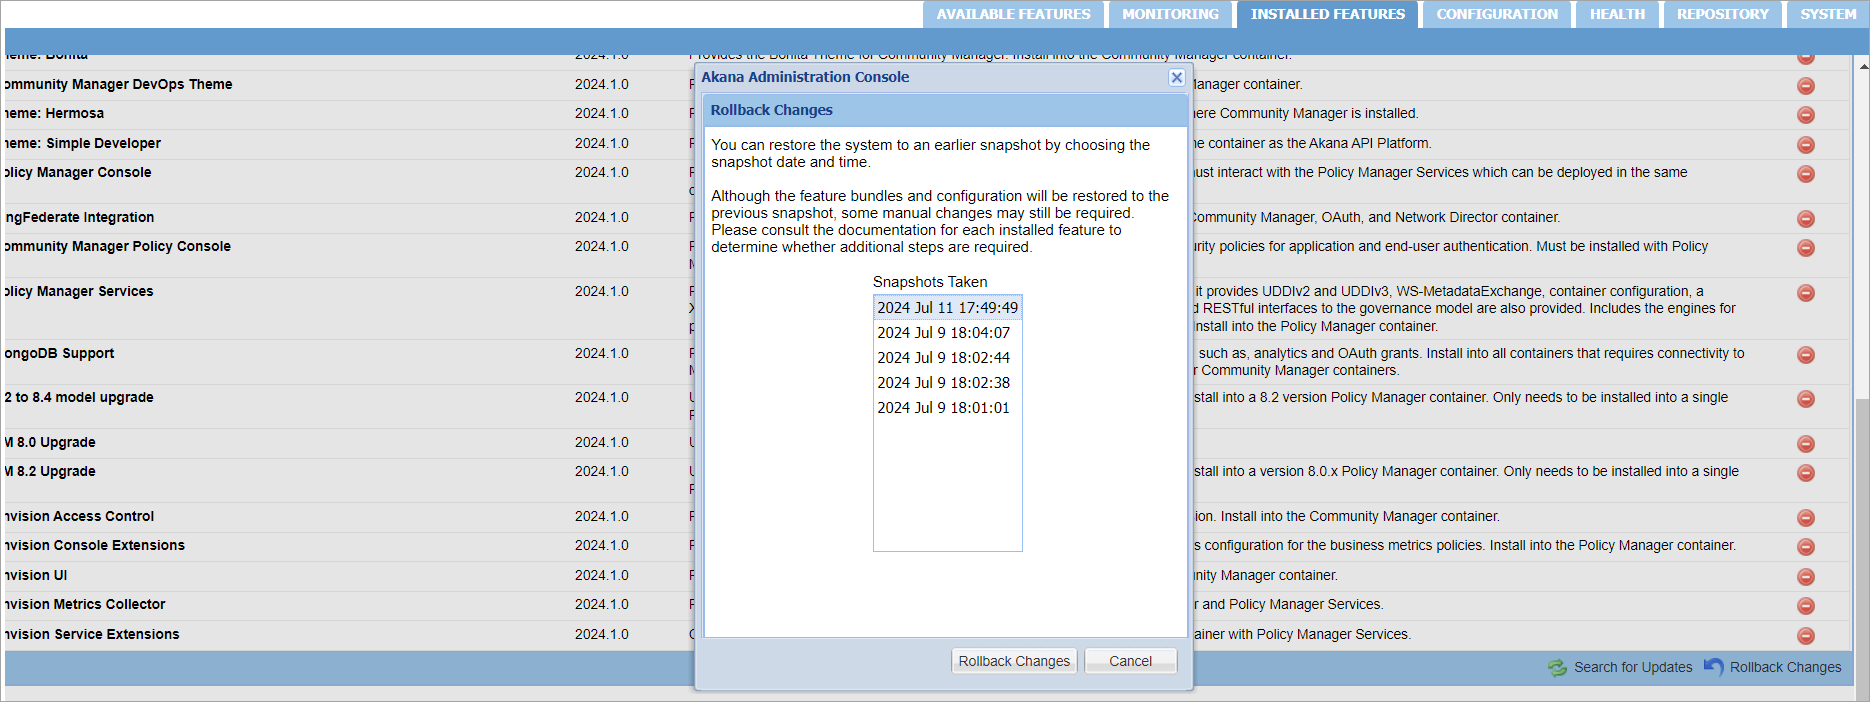
- Select the snapshot date and time to rollback changes to an earlier snapshot and then click Rollback Changes.
Rollback changes using an automation recipe
To rollback changes to a previous state, you can use an automation recipe when you need to undo a specific set of modifications or correct an error. For more information, see Using the rollback-patch recipe to install the rollback changes.
Rollback database schema changes
To manage the inherent risks of database schema changes, you can use the rollback feature to revert any updates quickly. By rolling back the schema changes and then reverting the database to its previous state, you can effectively mitigate the potential issues that may arise during an upgrade.
To rollback DB schema
- Log in to the Admin Console and go to the Configuration tab.
- Under Configuration Actions, click Manage Schemas. The Install Schemas dialogue box opens.
- In the Installed Schemas, search and select the appropriate version of the schema to revert the database schema changes.
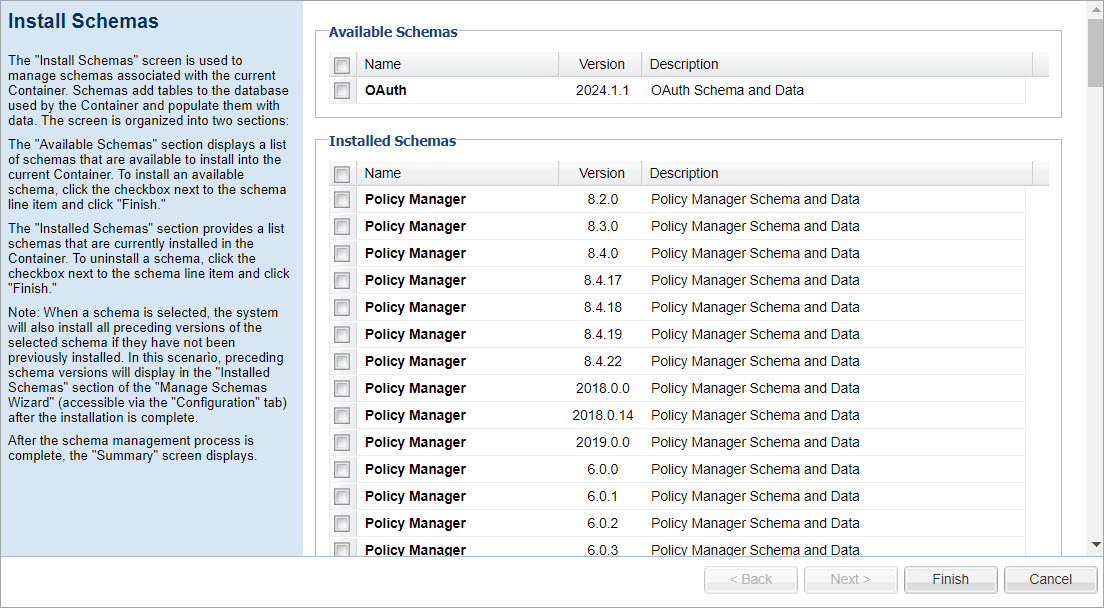
- Click Finish.
Rollback limitations
The rollback may not be possible in certain scenarios.
- If you install a new feature on a container after an upgrade, the rollback will not be feasible.
- Rollback cannot be performed until all the bundles installed in the container display a "running" status in the "System tab" of the Admin console.
Troubleshooting
Information to help you troubleshoot any issues that may arise during cumulative upgrades or rollback changes.
Zero exception during rollback changes
When performing upgrade or rollback changes from the user interface, you may encounter a prompt or alert displaying a numeric value of 0. This alert indicates the changes were successful, but the restart attempt failed.
Solution:
To resolve this issue, you must manually restart the container.