Using the Auditing Message Policy
Learn how to use the Auditing Message Policy.
For information about using policies in the context of the Community Manager developer portal, see Business Policies.
On this page:
Configuration
You can add or modify values for an existing auditing message policy on the Modify Auditing Message Policy page.
Note: To add an auditing message policy, use the Add Policy Wizard.
For information about using policies in the context of the Community Manager developer portal, see Business Policies.
To modify an auditing message policy
- Enter the following navigation path: Workbench > Browse > Organization. Select the Policies folder. The Policies Summary screen displays.
- To navigate to the Policy Details tab, click the policy name, double-click the Auditing Message Policy line item, or select View Policy Details from the Actions drop-down list box. The Policy Details information for the Auditing Message Policy is displayed.
- To modify the policy, navigate to the Auditing Message Policy portlet and click the Modify link. The Modify Auditing Message Policy screen displays. For information about the fields and options, see Auditing Message Policy Options below.
- Add or modify values as needed. When done, click Apply. The system returns to the Policies Summary screen.
Auditing Message Policy Options
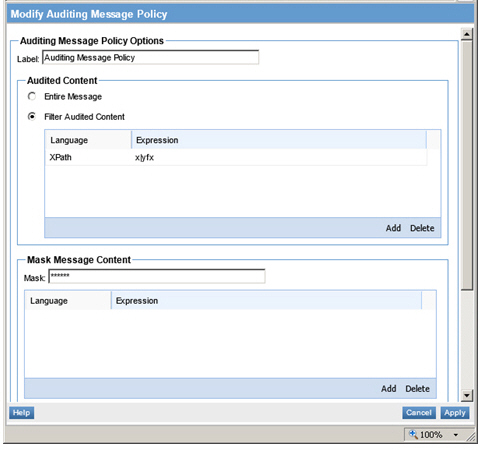
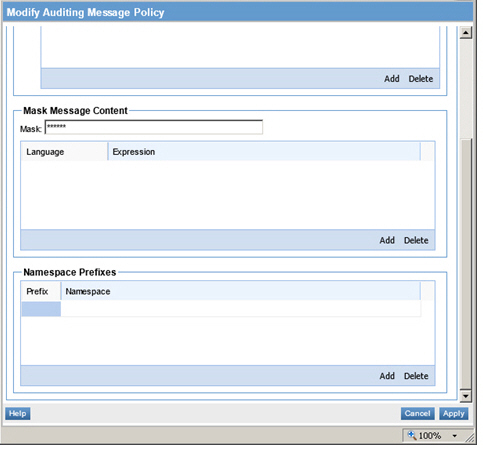
The Modify Auditing Message Policy page is organized as shown below.
Modify Auditing Message Policy page (top and bottom)


Here, you can specify values for the auditing message policy, as explained below.
Label—Specify a short, clear name for the recorded content in the audit record.
Audited Content
- Entire Message—Audits all message exchanges.
- Filter Audited Content—Allows filtering of a subset of messages based on one or more XPath, JSONPath, or Regular Expression filters. Specify one or more expressions that audited messages must satisfy. Click Add or Delete to add or delete rows in the table.
Note: Use XPath only with XML payloads. Use JSONPath only with JSON messages. Use RegEx if the content type is neither XML nor JSON.
Mask Message Content—Allows you to specify mask characters and XPath for message content you would like to hide. The Namespace Prefixes table allows you to enter one or more Namespace Prefix expressions for filtering messages. The table includes Prefix and Namespace table cells. The table cells are editable. Define the mask and then click Add to define one or more expressions.
- Mask—Allows you to specify characters that are used to mask (hide) content that matches the specified expression. The default mask is ******.
- Language/Expression—Specify one or more XPath, JSONPath, or Regular Expression filters. Click Add or Delete to add or delete rows in the table.
Note: Use XPath only with XML payloads. Use JSONPath only with JSON messages. Use RegEx if the content type is neither XML nor JSON.
Namespace Prefixes—Allows you to specify one or more expressions that audited messages must satisfy. Add or delete rows as needed.
- Prefix—Specify the prefix of the namespace used in the expression.
- Namespace—Specify the namespace associated with the prefix.
Activating a policy
When you create and configure a policy, the policy is in Draft state. When the policy configuration is complete, activate the policy: click Activate Policy and then confirm. See Activate a Policy.
A policy in Draft state is not available for general use. Once you activate the policy, it is in Active state and is available for use.
Attaching a policy
To use the policy, go to the Policies folder in the respective organization and attach the policy to a web service, binding, or binding operation.