Getting Started for App Developers
Learn how to add an App and connect to it.
The Community Manager developer portal brings API providers and App developers together. It provides easy access to powerful API Management capabilities combined with a social community allowing developers to collaborate to build innovative Apps with scalable APIs.
On this page:
- Step 1: Sign Up
- Step 2: Create an App
- Step 3: Find an API and Request Access
- Step 4: Test Your App
- Step 5: What's Next?
Step 1: Sign Up
Sign up for an account if you don’t already have one. You can register locally, or use your favorite social networking account. See How do I sign up for a new account?
Step 2: Create an App
Before you create one we should probably explain what an App is (and isn’t). An App is a metadata construct that describes the application and manages its identity and credentials. It is not a software application running on a device, it just describes one or more of these software applications. Developers use the App construct to request and manage access from their Apps to the APIs they consume, so that any software application that is using the credentials defined in the App construct will have access to APIs as negotiated.
Adding an App is a simple process. For instructions, see How do I add an app?
The system will show this information to users and it is all indexed by the system’s search engine, so try and use names, tags and descriptions that will match the types of things you think users might search for when looking for an App like yours. The first page will also ask you to choose privacy settings for your App, when you first add an App it’s a good idea to set it to private so that you can make sure it works. You can always make it public later.
That’s it, you’ve added your App. At this point it’s worth taking a look at the App. Check out the App Details page with the App credentials, see what the Forum is all about, and check out the Team features. We’ll get to APIs, the Test Client testing tool, and Analytics later on.
Step 3: Find an API and Request Access
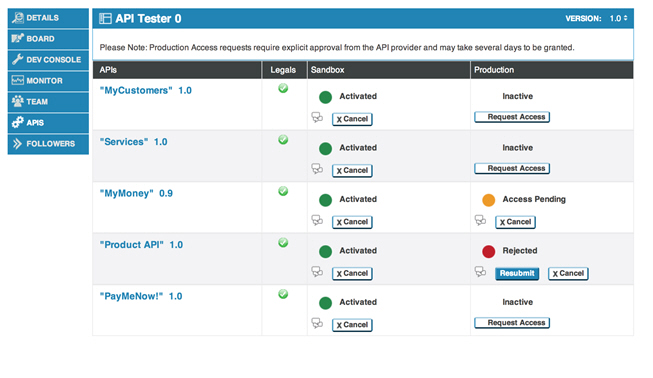
Now that you have an App defined in the system you need to connect it to some APIs so that you’re ready to start (or finish as the case may be) your actual App. You can search or browse the system to find an API you want to use, and can use the  button to start the workflow process for getting access. It's a pretty simple process. You choose which of your Apps you want to connect to this API, choose the endpoint you want to connect to, choose a QoS policy (if specified by the API Admin), review and accept any legal agreements, and submit the request. Depending on the approval settings for the endpoint, your request may be automatically approved, or may require administrator approval. You can check the status of your access request using the APIs section of your App’s navigation:

Step 4: Test Your App
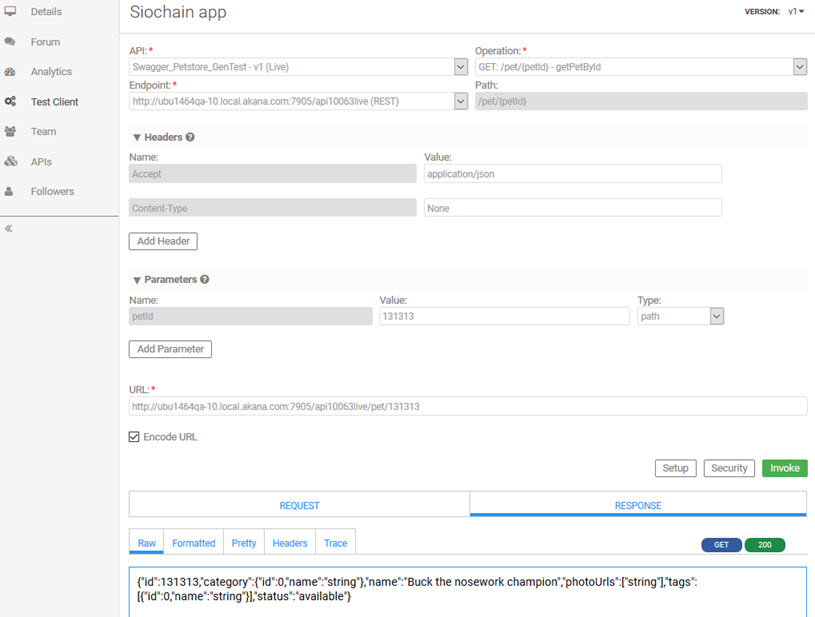
Once your app has approved access to an API you can use the App’s Test Client feature to browse the API and send test messages. This allows you to easily see how your code needs to interact with the API and to debug any issues you may run into.

You can click here for an in-depth explanation of how to use Test Client, but it should be fairly self-explanatory.
Step 5: What's Next?
Ok, you’ve created and tested your App. This platform has a lot more to offer you. You should check out what we can do for you for monitoring, team management, and managing apps.