Use OpenID Connect with OAM
You can configure single sign-on authentication using the OpenID Connect protocol as an identity provider with Oracle Access Manager. To learn more, review the step-by-step instructions in this use case.
On this page:
- Prerequisites
- Configure the OpenID Connect Relying Party Domain in the Community Manager Developer Portal
- Enable Login Domain
- Steps to Verify the SSO Configuration
Prerequisites
Before you begin:
- Capture the well-known configuration URL from OAM by using the /.well-known/openid-configuration URL. The configuration URL will have the structure, {OAM URI}/.well-known/openid-configuration. In this use case, the https://oam.acme.org/.well-known/openid-configuration well-known configuration URL is used. For more information, see Get OpenID Connect Well-Known Configuration.
- Create an OAuth Client in OAM to use for authentication in the Community Manager developer portal.
- Use the Akana ssoLogin URI for redirects. The redirect URL will have the following structure, {CM URI}/api/login/ssoLogin. For more information, see Login Service.
Configure the OpenID Connect Relying Party Domain in the Community Manager Developer Portal
- Log in to the Community Manager developer portal.
- Go to More > Admin > Domains.
-
Click Add Domain and select the OpenID Connect Relying Party domain.

-
On the first tab, Details, provide a name for the domain. For this use case, OAM OpenID Connect Domain is used.
-
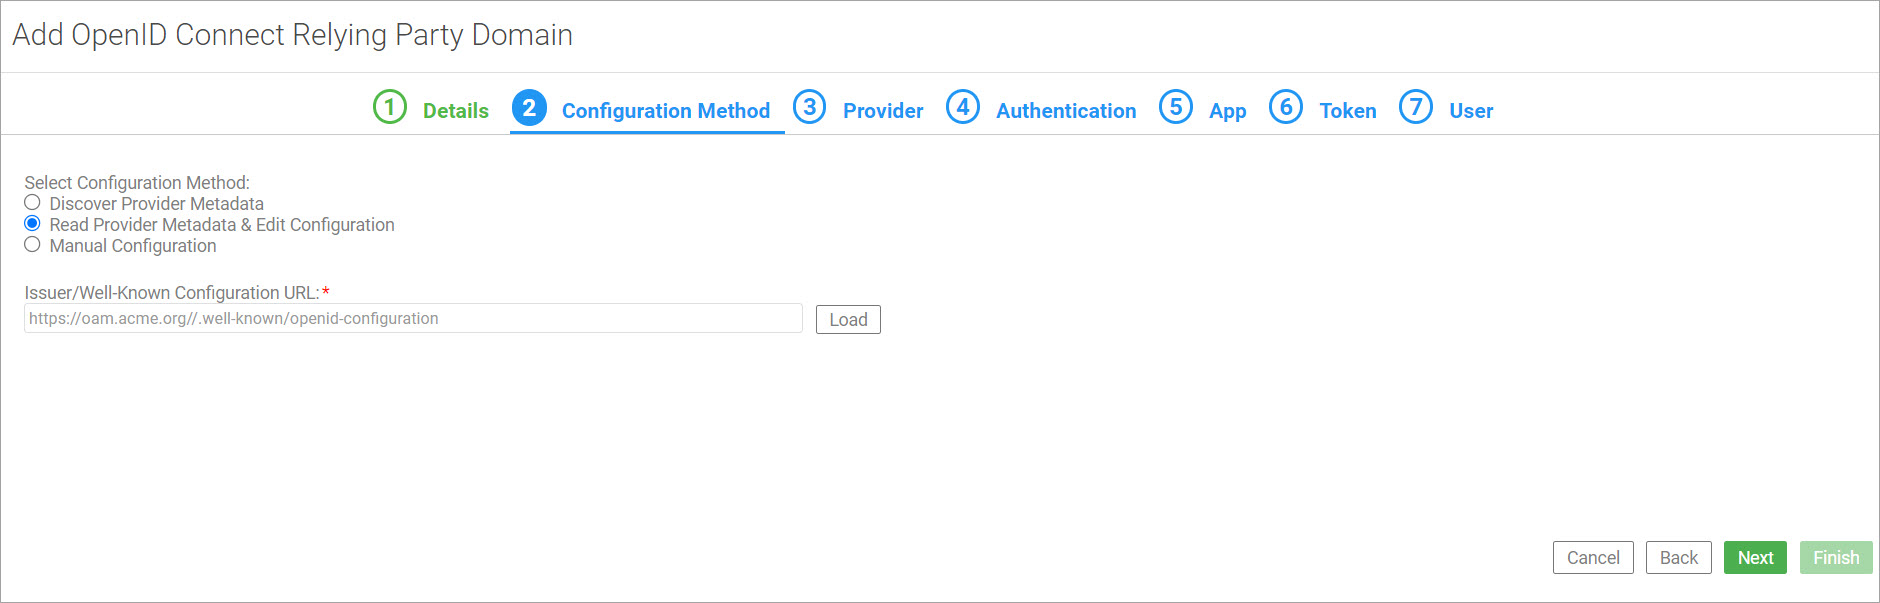
On the second tab, Configuration Method, select the Read Provider Metadata & Edit Configuration option to read the configuration information from the OpenID Connect Provider's well-known configuration URL (discovery endpoint) so that the platform can access the provider metadata. Click Next.
-
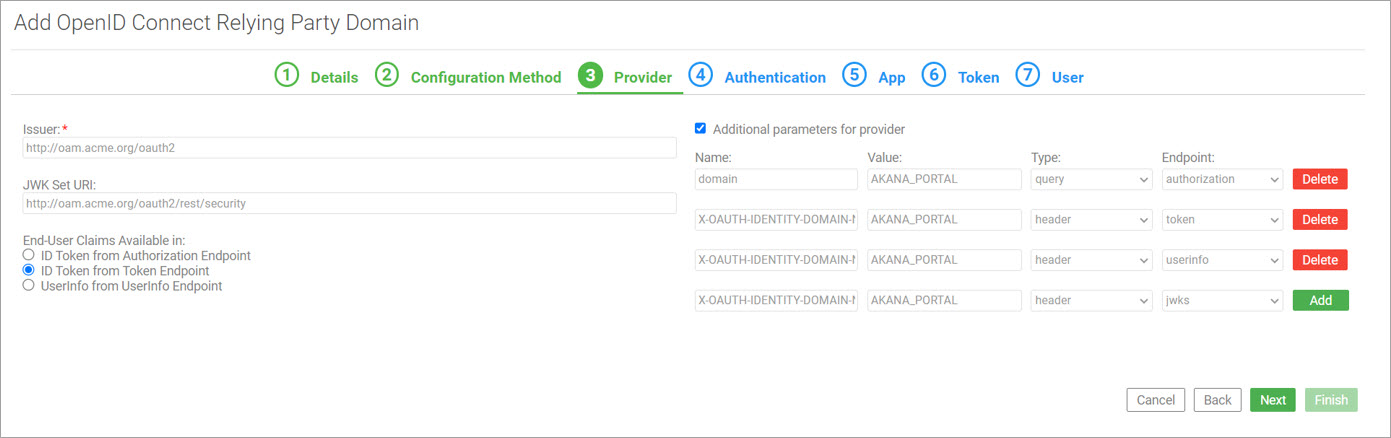
On the third tab, Provider, specify basic information about your OpenID Connect identity provider and provide additional parameters required by OAM for OIDC endpoints. The X-OAUTH-IDENTITY-DOMAIN-NAME is a required parameter for Oracle Access Manager to issue a token for the authorization, token, user info, and JWKS endpoints. Also, the domain is a required query parameter for the authorization endpoint. For more information, see Administering Oracle Access Management. Click Next.
-
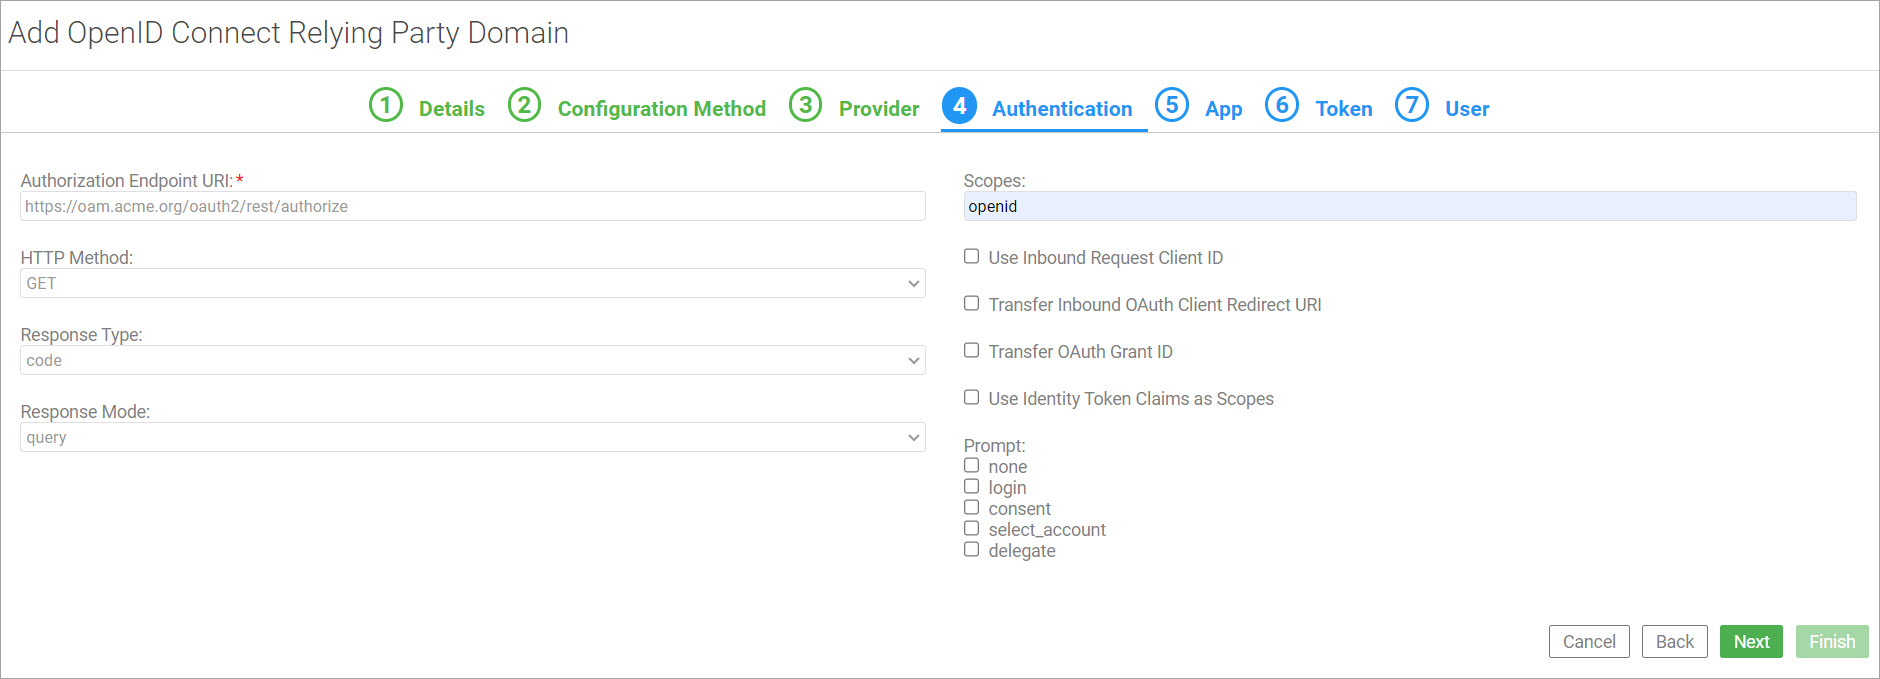
On the fourth tab, Authentication, specify values associated with user authentication and authorization. Click Next.
-
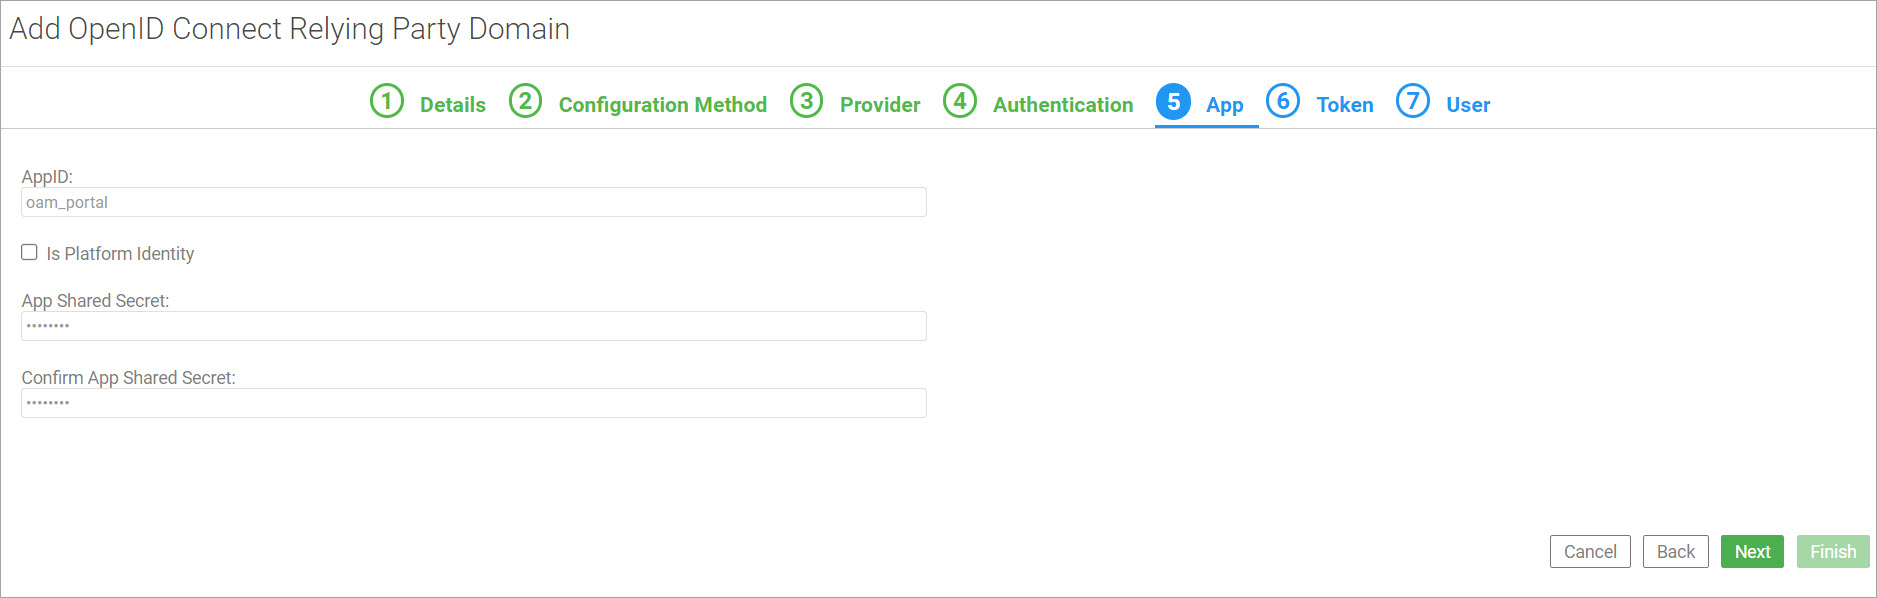
On the fifth tab, App, specify values in the AppID, App Shared Secret, and Confirm App Shared Secret fields that uniquely identify your app with your OpenID Connect identity provider. Click Next.
-
On the sixth tab, Token, specify the token endpoint URI and client authentication method to authenticate the relying party request for access. After authentication is complete, the process returns an access token. Click Next.

-
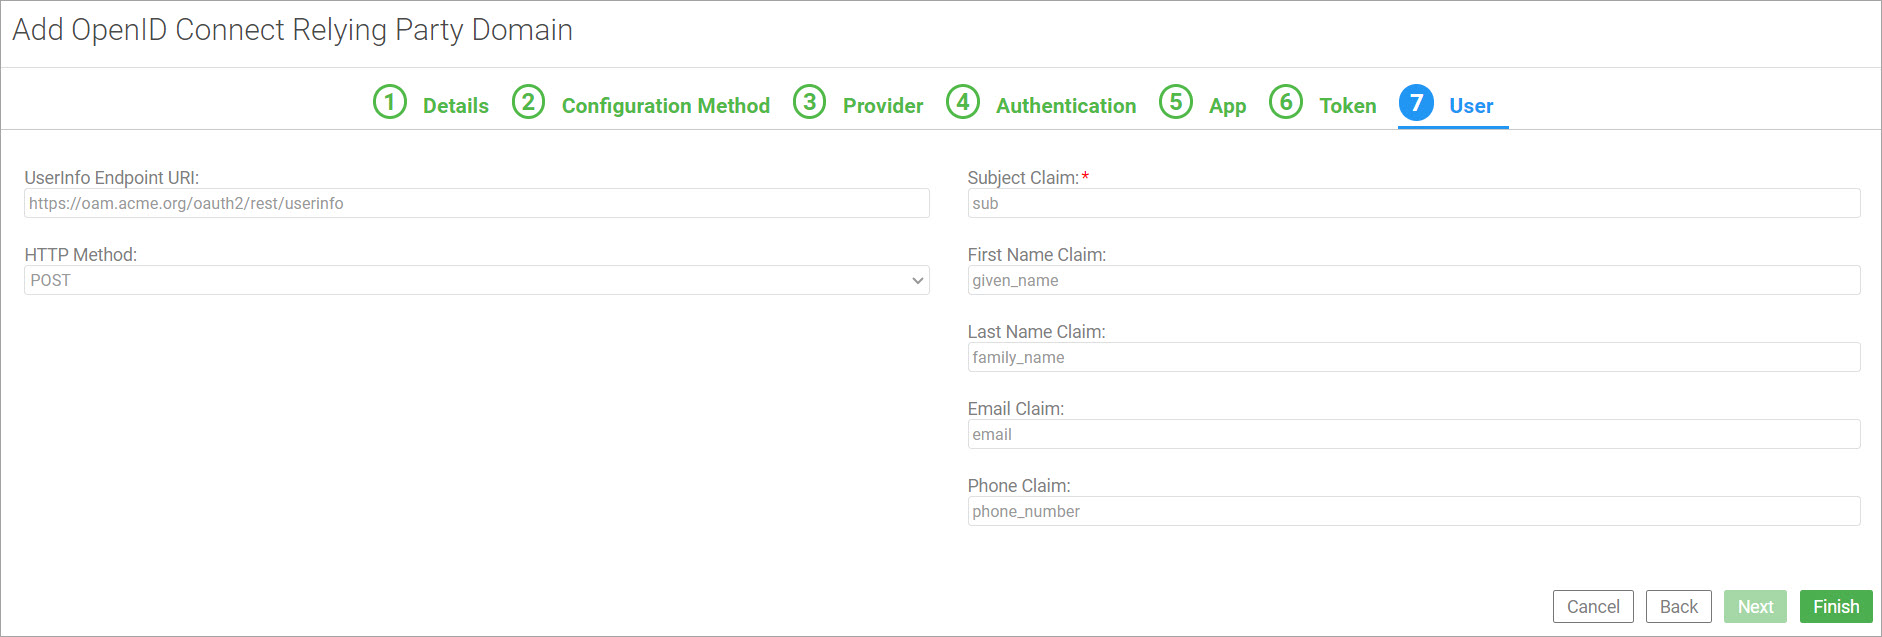
On the seventh tab, User, specify information relating to the UserInfo endpoint.
-
Click Finish to save the domain configuration.
Enable Login Domain
- Log in to the Community Manager developer portal.
- Go to the More tab, select Admin, and then select Logins.
-
Select the checkbox next to the OAM OpenID Connect Domain to enable it as a platform login domain, and then click Save.

Steps to Verify the SSO Configuration
-
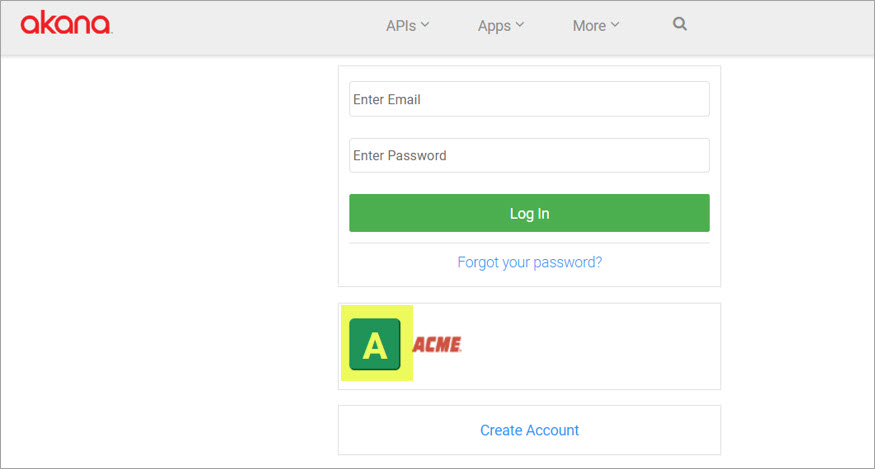
On the Community Manager developer portal login page, select the login domain. For this example, the Acme domain is used.
-
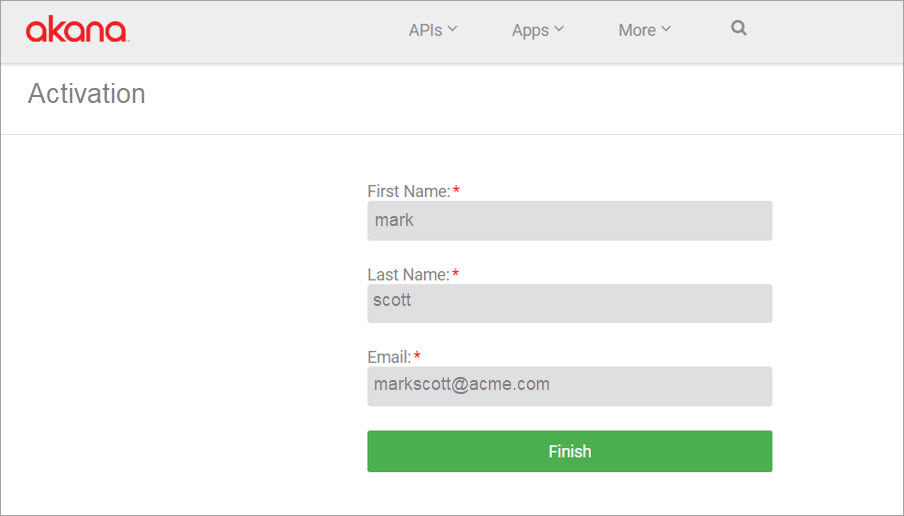
Verify that the user is redirected to the activation page. Enter the credentials to activate the user platform login, and then click Finish.
- Verify that the user successfully logged in to Community Manager by using the credentials configured for Open ID.